Add a Device UDID to Your App
The full flow for adding a device UDID to an Ad Hoc iOS app: registering the device, generating a provisioning profile, and re-packaging the IPA.
When distributing an iOS app via Ad Hoc, the target device's UDID has to be registered in the app's mobileprovision file, or the app won't install. This page walks through adding a UDID to the provisioning profile.
Prerequisites
- An Apple Individual, Company, or Education developer account (not Enterprise). For the differences between account types, see iOS signing certificate types.
- The UDID of the device you want to add. See iOS device UDID for how to retrieve it.
- A Mac with Xcode installed.
With an Apple Enterprise account ($299), you can use In-House signing directly and skip per-device UDID registration.
Add the UDID to Your Developer Account
- Sign in to Apple Developer.
- Go to Certificates, Identifiers & Profiles → Devices.
- Click to add a new device and fill in the device name and UDID.
Create a Provisioning Profile
- Go to Certificates, Identifiers & Profiles → Profiles, click Create, and choose the
Ad Hoctype.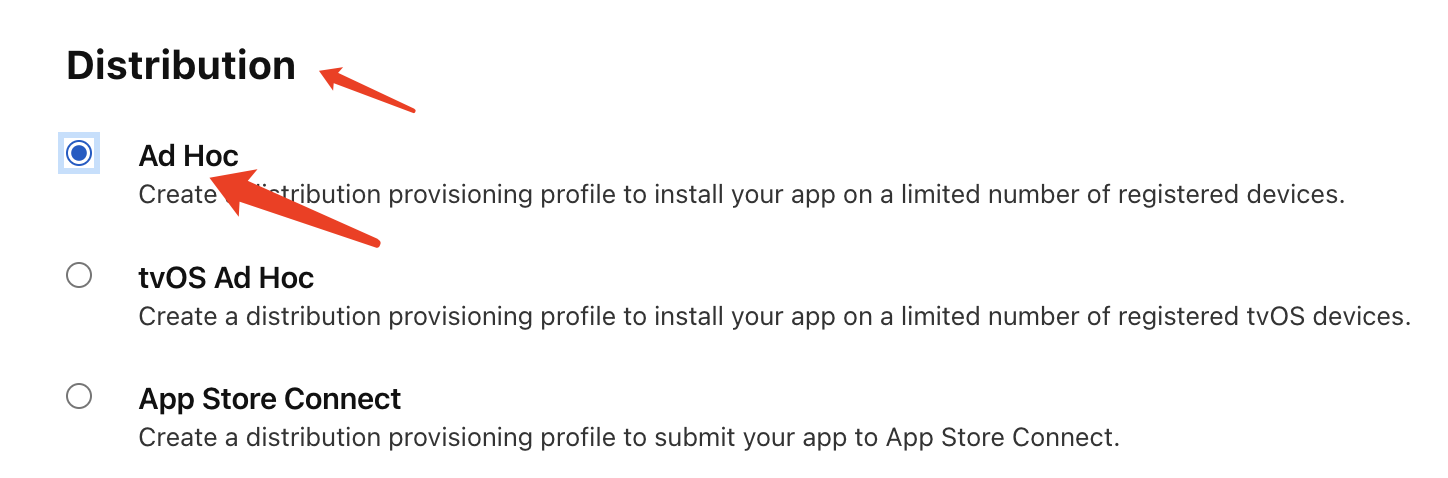
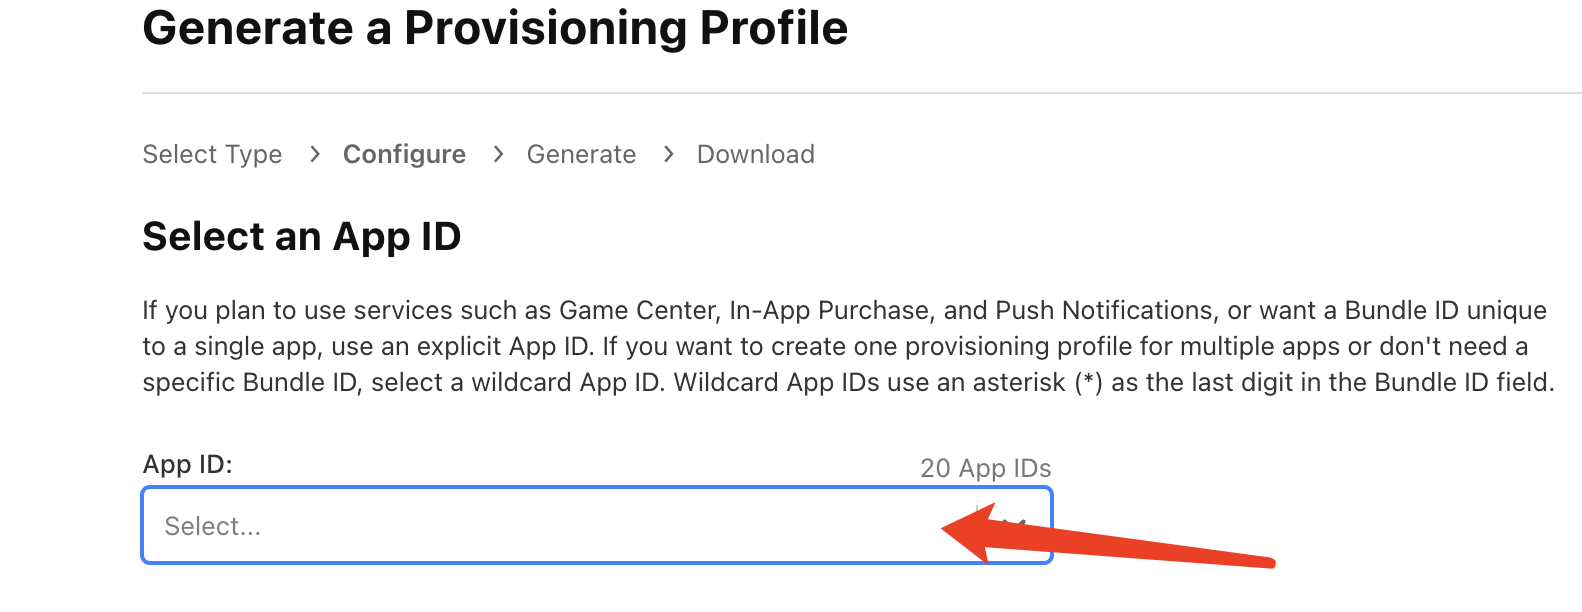
- Select the matching App ID.
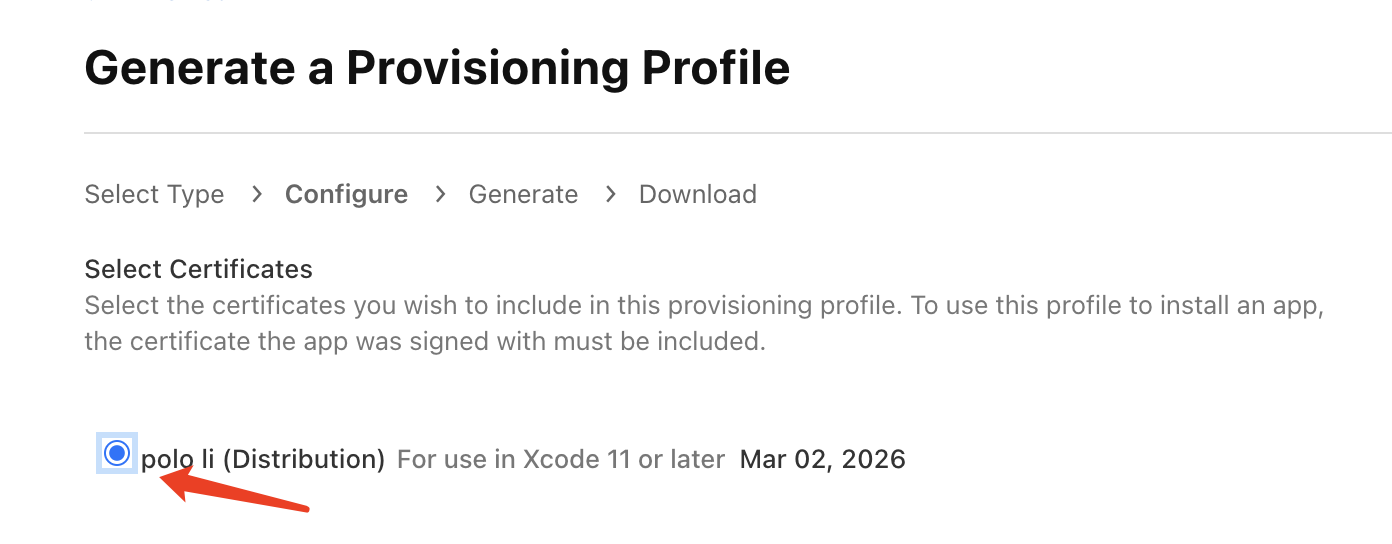
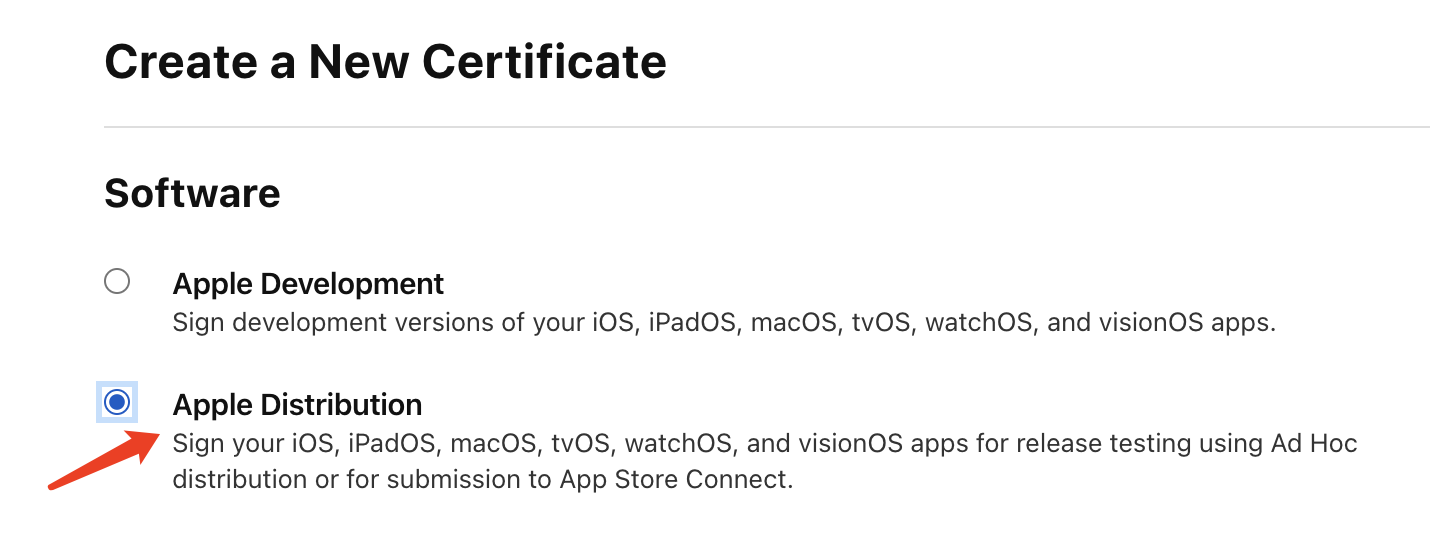
- Select the matching Ad Hoc certificate. If none is available, create one first.
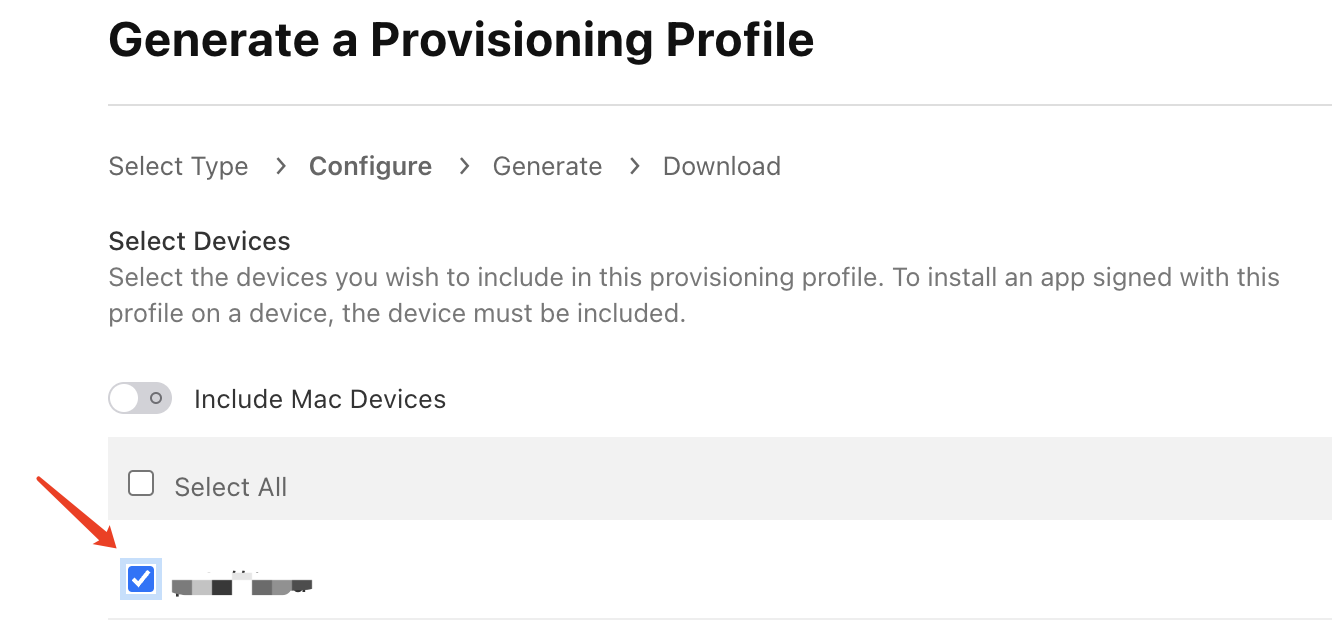
- Check the devices you want to include.
- Name the provisioning profile, then generate and download it.
Re-package the IPA
- Open Xcode and select the project.
- Set the run target to Any iOS Device (arm64).
- Choose Product → Archive and wait for the archive to finish.
- Click Distribute App.
- Choose Custom and click Next.

- Pick the
Ad Hoctype and click Next.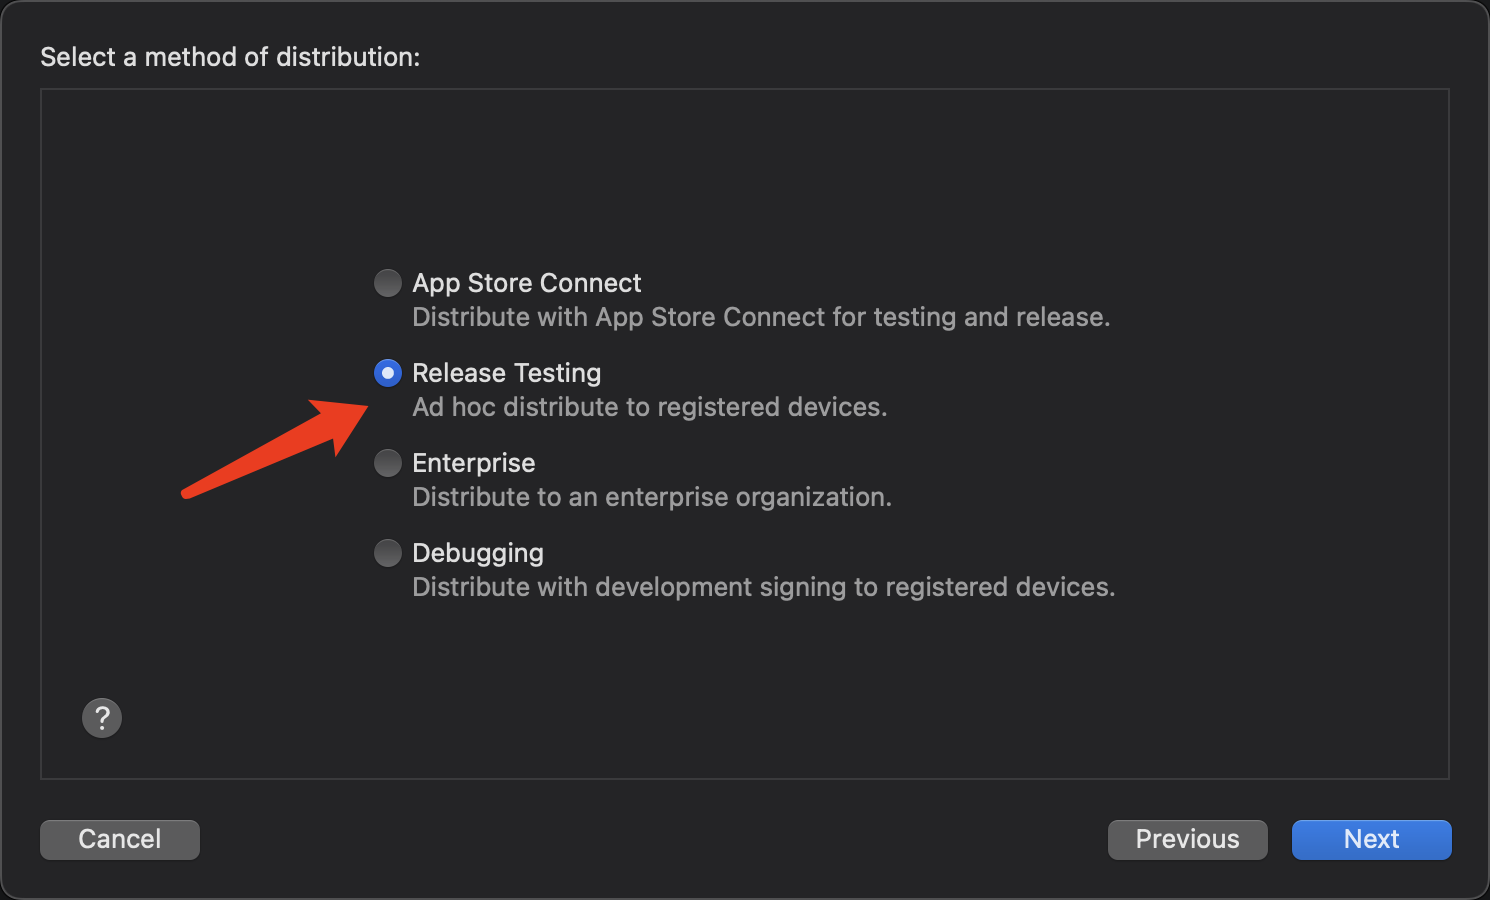
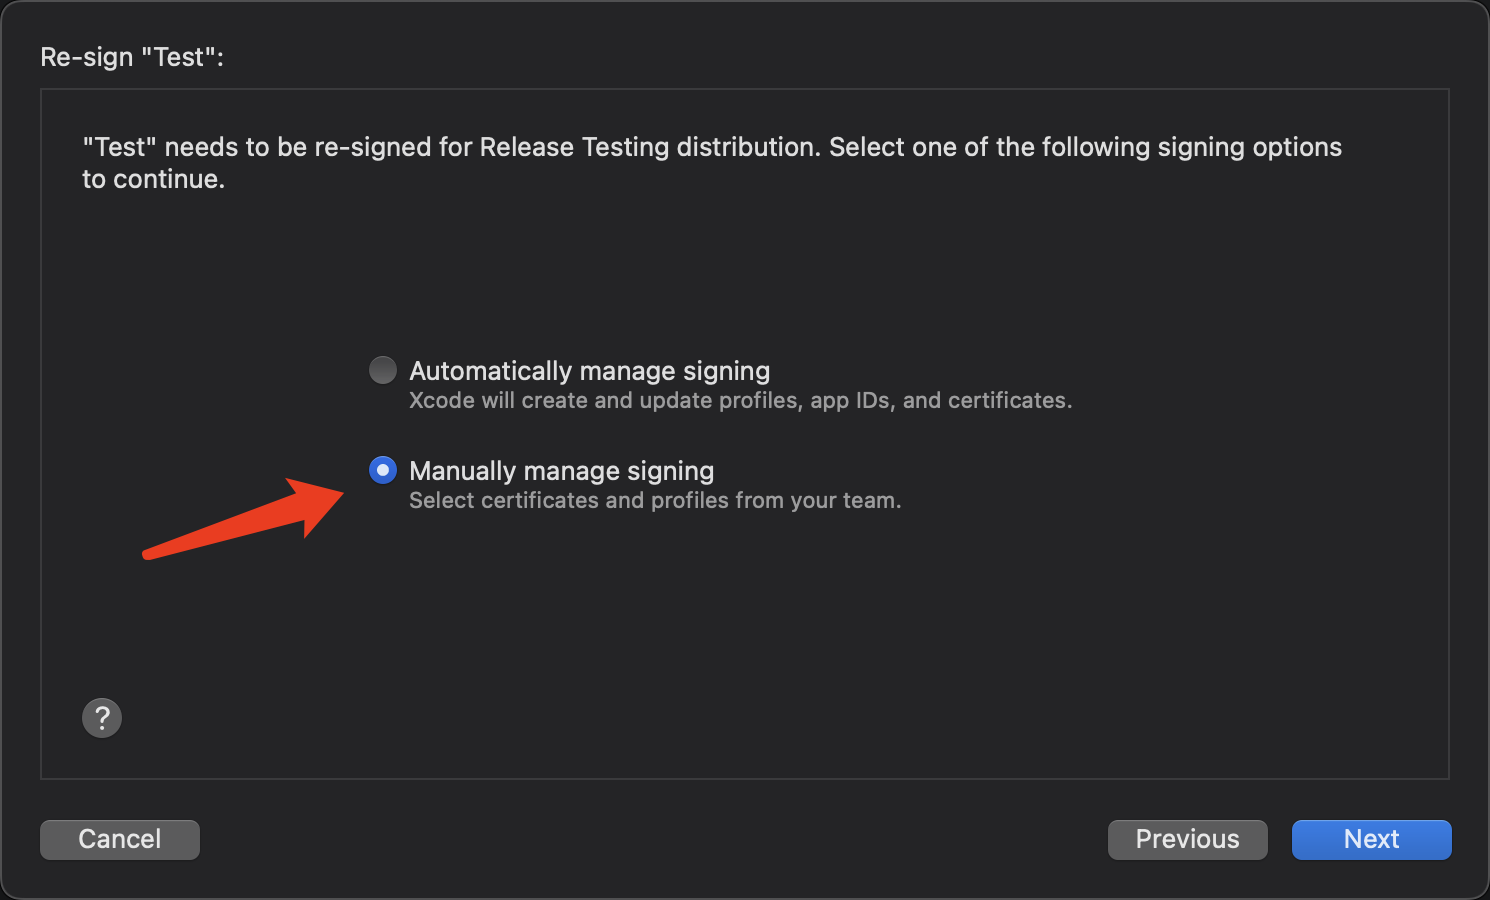
- Choose Manually manage signing so you can specify the certificate and profile yourself, then click Next.
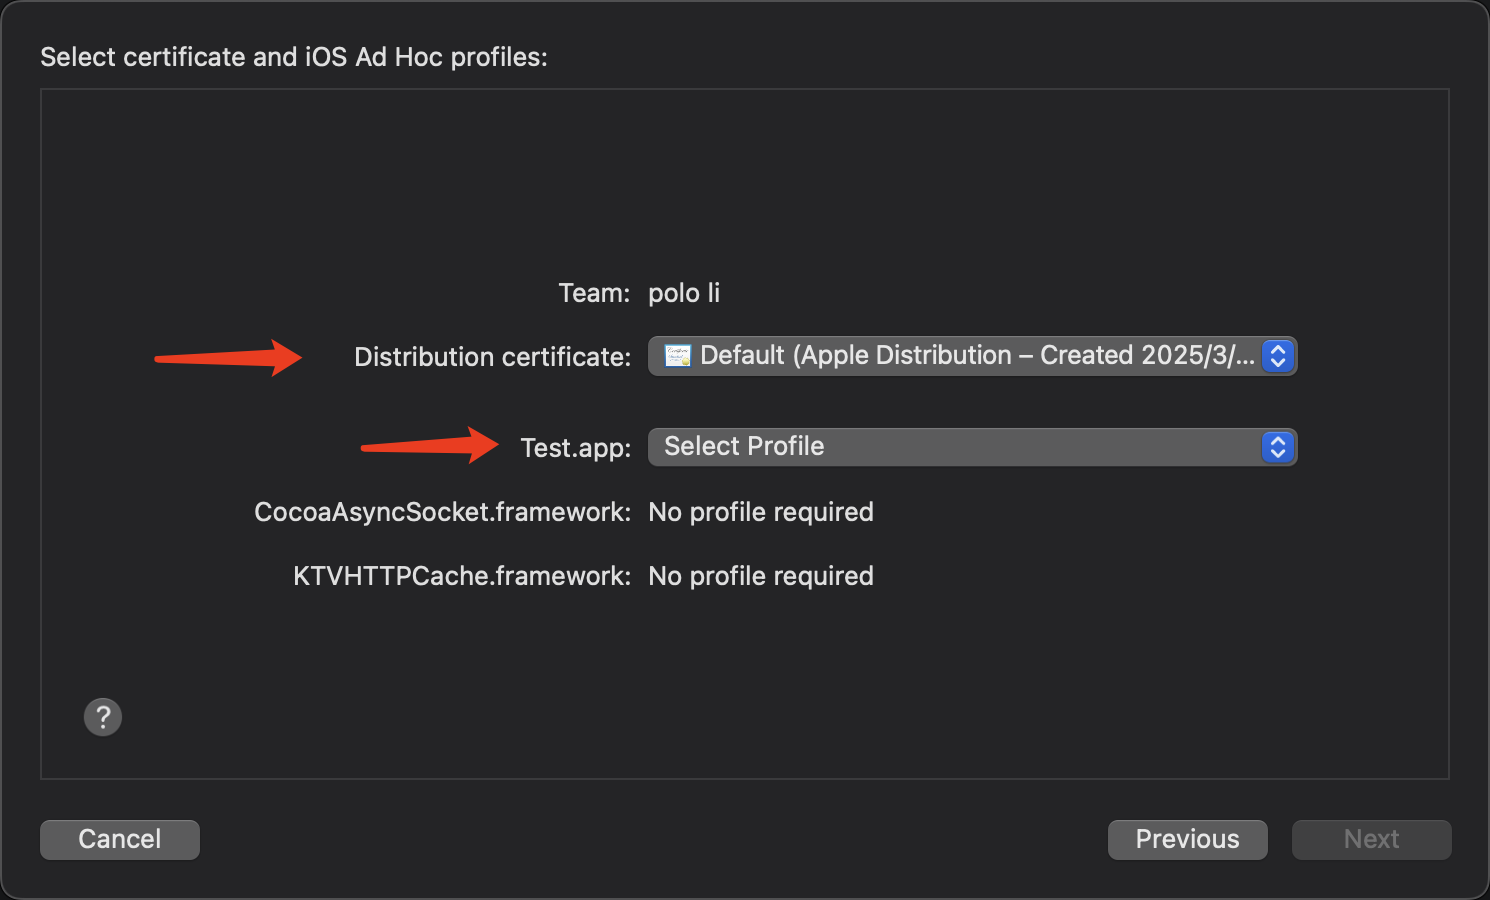
- For the certificate, pick the Ad Hoc certificate from the previous section; for the profile, pick the one you just downloaded.
- Export the IPA.
Upload the Installer to Pgyer
Once uploaded, devices whose UDIDs are in the provisioning profile can install the app. Pgyer labels the release as Beta and lists the UDIDs contained in the profile.
For upload instructions, see Upload Your App.
Create an Ad Hoc Certificate (Optional)
If you don't already have an Ad Hoc certificate, follow these steps.
Generate a CSR on Your Mac
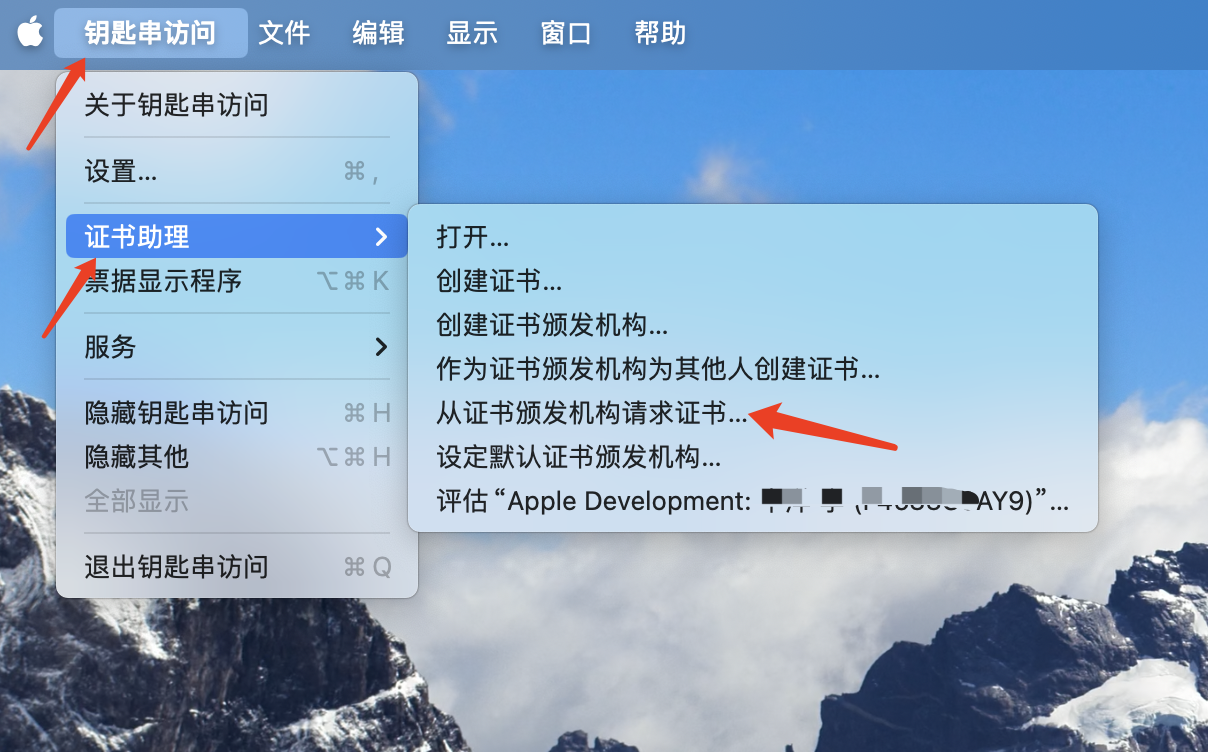
- Open Keychain Access.
- In the top menu, choose Certificate Assistant → Request a Certificate From a Certificate Authority.
- Enter your developer account email and a name, then choose Saved to disk.
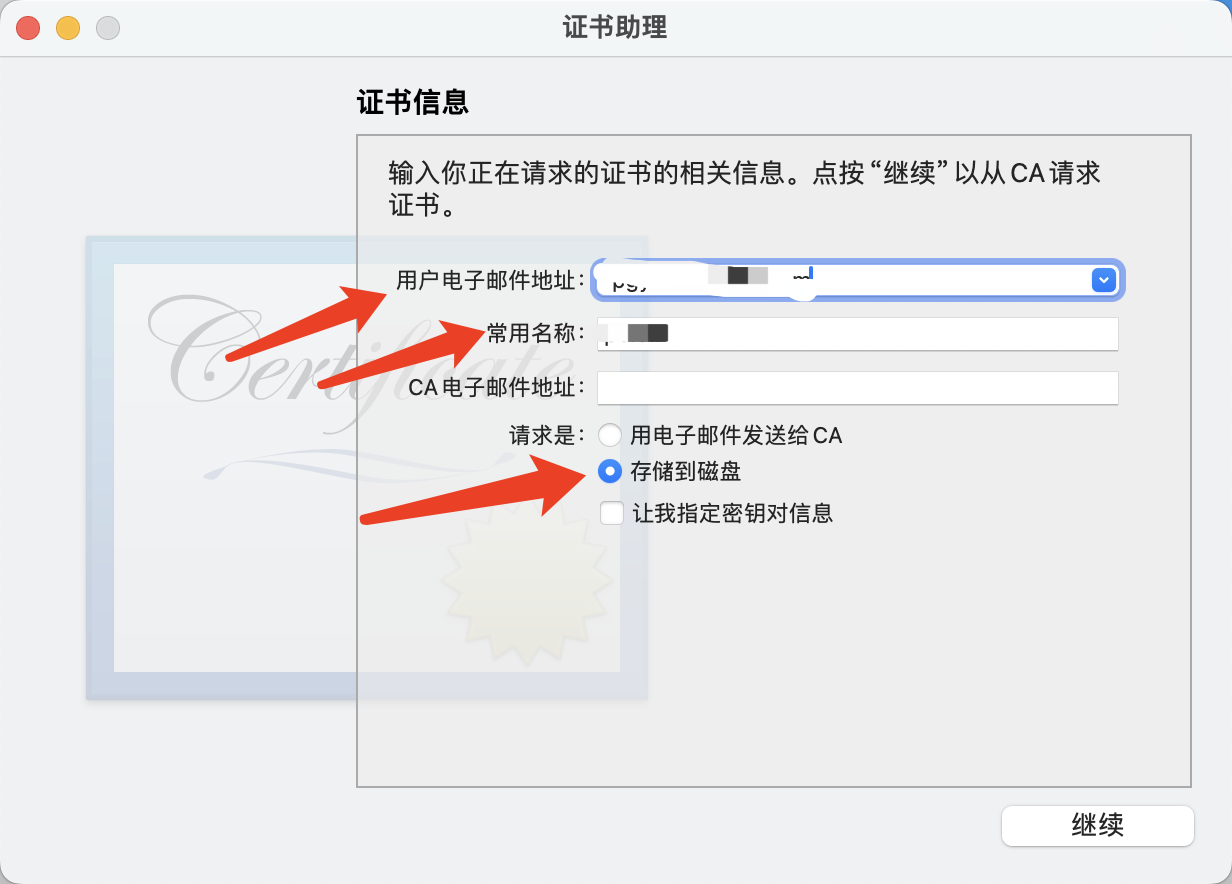
- Pick a location and save the file.
Upload the CSR to Apple Developer
- Sign in to Apple Developer.
- Go to Certificates, Identifiers & Profiles → Certificates.
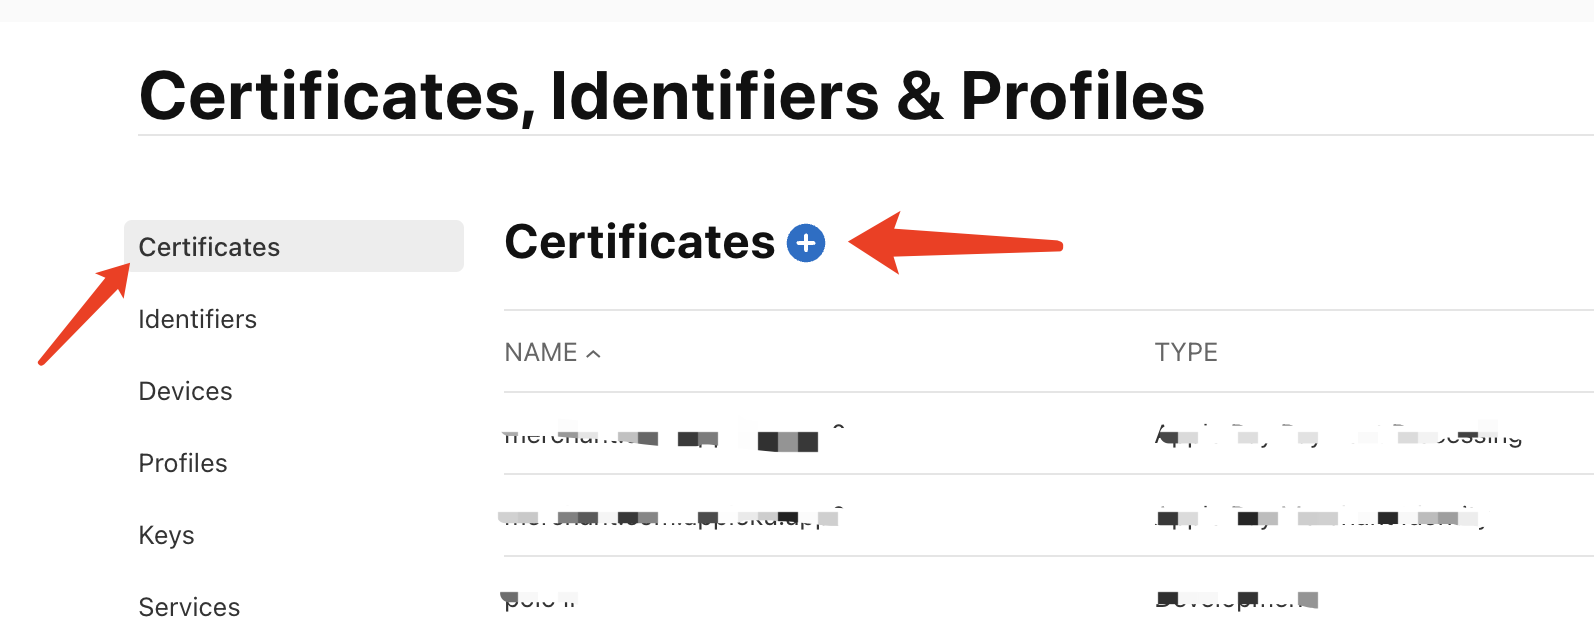
- Click +, pick the certificate type you need, and continue.
- Click Choose File and select the
.certSigningRequestfile you just generated.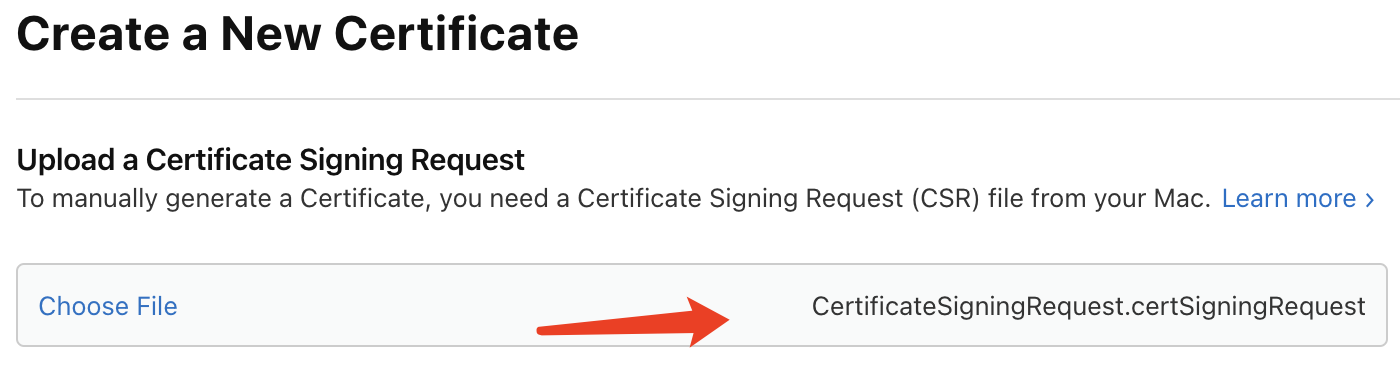
- Click Continue and Apple will generate a
.cercertificate. - Download the
.cerand double-click to install it into Keychain Access.
iOS Device UDID
What an iOS UDID is, how to retrieve one, and its role in the Ad Hoc distribution flow.
Troubleshooting iOS Install Failures
Common symptoms and remedies for iOS install failures — signing errors, enterprise certificate trust, Developer Mode, iOS version, storage, date/time, network, and profile conflicts.